Continuing Your Service After the Free Trial
Please follow these steps if you want to continue your service after the free trial:
1. Activate your paid account
To continue the service after the trial, complete billing information is needed to activate your paid account, which ensures a service invoice can be properly addressed and sent. With a paid account, users will also be granted the Shell access in the Control Panel.
Complete your billing information
Log in to the Control Panel and go to the information update page through accesses below.
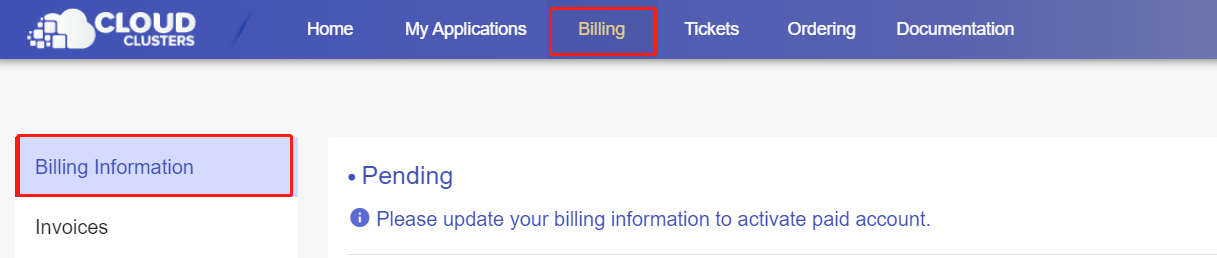
1> Click Billing > Billing Information from the top navigation bar.
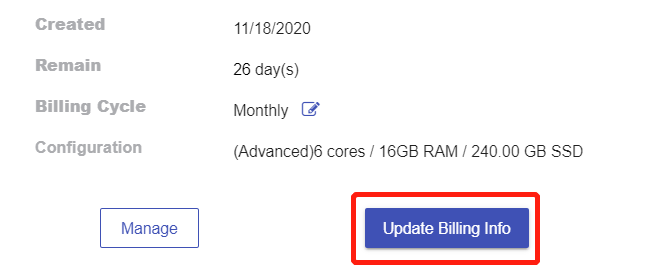
2> Click the “Update Billing Info” button on the My Applications page.
3> Follow the steps in reminder emails. Before your free trial expires, reminder emails will be sent to you to complete your account details. You can follow the steps illustrated in the emails.
Wait for the verification
We typically practice automatic verification, which will complete in a few minutes. In some cases, it requires manual verification process. The manual verification process might take up to 2 hours. Once passing our verification, you can extend the service due date by renewing your service.
Notes: Some of our clients may receive an email named “Cloud Service Verification Request.” If you receive that email, please respond to us at your earliest convenience so that the verification process can move forward.
2. Renew your services
By renewing your service, an invoice for the next billing cycle will be generated so that you can pay it to extend the due date. Before the renewing, please confirm:
1>if you need to change your billing cycle.
2>if you need to upgrade/downgrade your plan.
3>if you need additional add-ons.
2.1 Change billing cycle
Billing cycle comes in monthly, semi-annually, annually, and biennially. The longer the billing cycle is, the lower the price is. By signing up for a longer billing cycle, you can save big on your hosting. Click the pen icon after the billing cycle field on the Overview or My Applications page to change your billing cycle.

2.2 Upgrade/Downgrade your plan
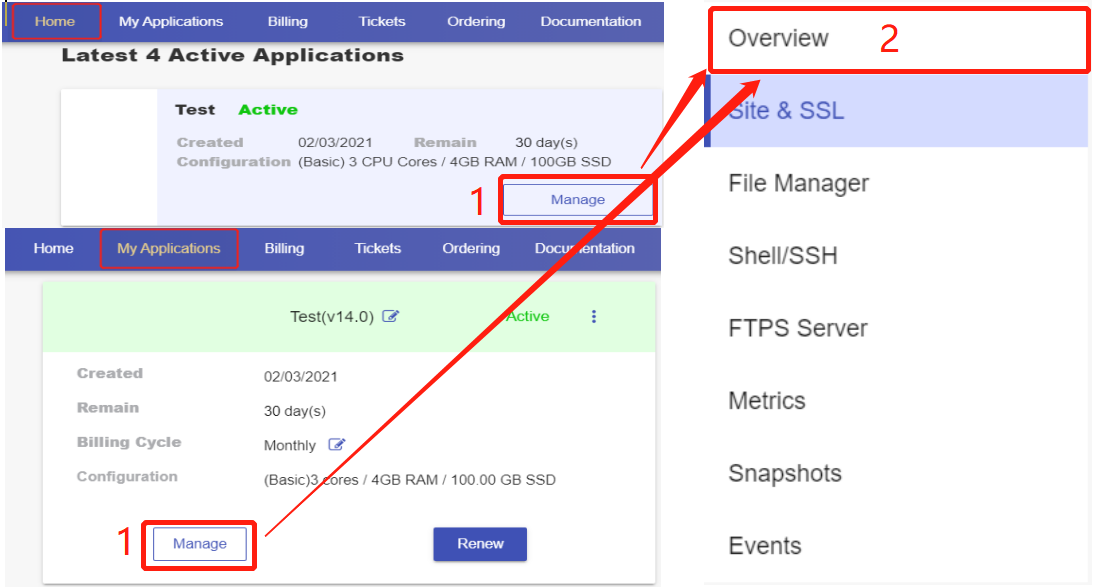
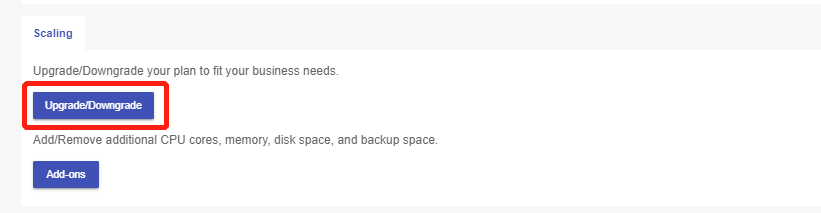
Click Manage on the Home page or the My Applications page. Then scroll down to the Scaling section to upgrade or downgrade your plan.
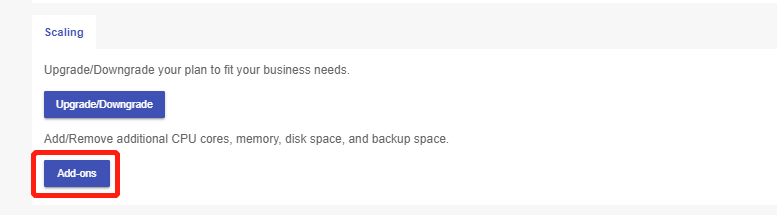
2.3 Add-ons
Scroll down to the Scaling section on the Overview page to add more resources to your plan.
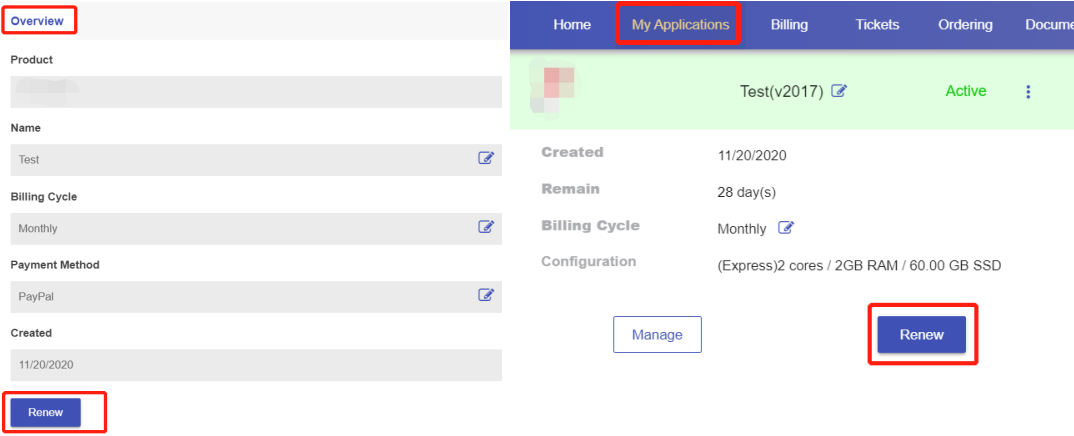
2.4 Renew your service
After all these have been taken, you can click the "Renew" button on the Overview page or My Applications page to generate an invoice with the information of billing cycle, plan, and add-ons you just set.
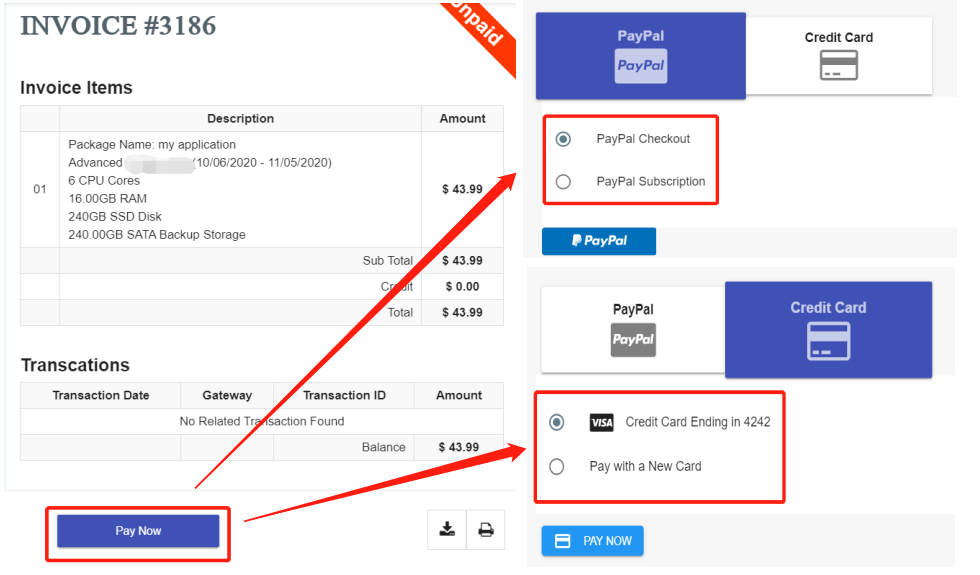
3.Make payment
Click "Pay Now" to pay the invoice.
If you would like to make payment later, the invoice can be found from the Unpaid invoice list on the Invoices page under the Billing tab.
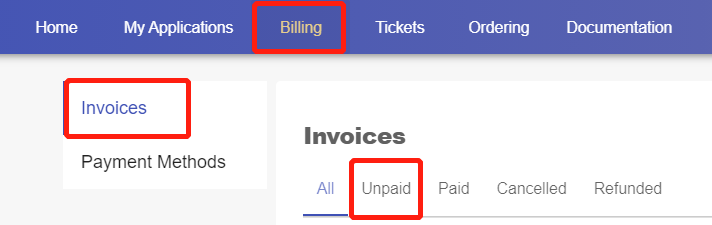
Once the invoice is paid, your service will be renewed immediately.
Note: Please note that if the invoice remains unpaid when your service is overdue, the service will be scheduled to be deactivated 3 days past due and to be canceled 14 days past due.